Sometimes you want to get very close to your subject. Maybe you’ve found a flower that is attractive to you, or a bee taking pollen. Maybe you need to photograph some coins or stamps from your collection for insurance purposes. Any time you need to take a picture up close, you need a macro lens. A macro lens is especially designed for close-up pictures. Most genuine macro lenses are also prime lenses (see previous section) not zoom lenses. They don’t look much different from a regular prime lens except that the internal lens elements are designed in such as way that it is easy to make “life-size” images.
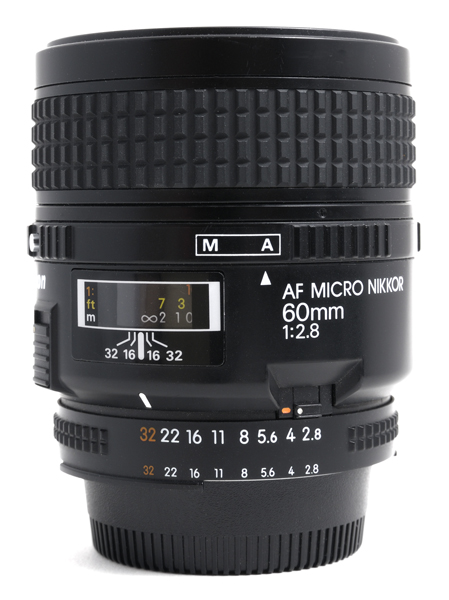
A true macro lens (figure 1) has a 1:1 ratio, which means it can take a picture of an object and render it in its normal size. A bee on a flower is the same size on the sensor as the real bee on a flower. That is hard to do with a zoom lens—or a regular prime lens—because they will not focus close enough.
Some zoom lenses are advertised as “macro” zoom lenses. Those lenses can focus closer than most zoom lenses but they are not true macro lenses. Most macro zooms are limited to about half-life size or a 1:2 ratio, which means a bee on a flower would only be half its normal size on the sensor. You just cannot get close enough with most zoom or regular prime lenses. For maximum close ups only a true macro lens with a 1:1 ratio (lifesize) will do.
Figure 1 – AF Nikkor 60mm f/2.8 Macro Lens
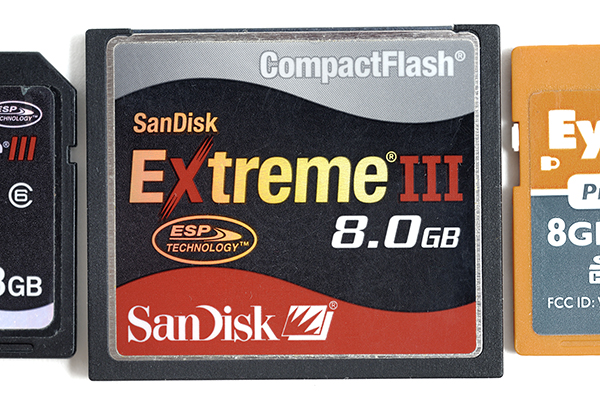
In figure 1 is a picture of a real Nikon macro lens, the AF Nikkor 60mm “Micro Nikkor.” Nikon calls their macro lenses by the name Micro Nikkor. Most other lens brands use the word Macro. In figure 2 is a macro image of a compact flash memory card with a couple of SD memory cards lying next to it. Notice how realistic the close up image looks. It is a true macro shot taken with the Nikkor macro lens above.
Figure 2 – A picture taken with the AF Nikkor 60mm f/2.8 Macro lens
Real macro lenses are a bit more expensive than standard prime lenses because they are a specialty prime lens. They have special features to make the picture look its best, such as “flat-field” design, which keeps the edges of the picture from curving in a distracting way. Macro lenses are highly corrected lenses, which mean the lens elements are carefully designed to give maximum quality and lack of aberrations (color shifting or shape warping). They are optimized for up close work. That does not mean you shouldn’t use a macro lens to take a picture of a more distant object, they do fine there too. They are simply made to do their best work at 1:1 distances (extreme close ups).
For maximum image quality, it is a good idea to use a real macro lens. However, there are substitutes that cost a lot less money. Let’s consider one low cost way to get extreme close up images without the expense of a macro lens, screw-on closeup filters.
Close Up Diopter Screw-On Macro Filters
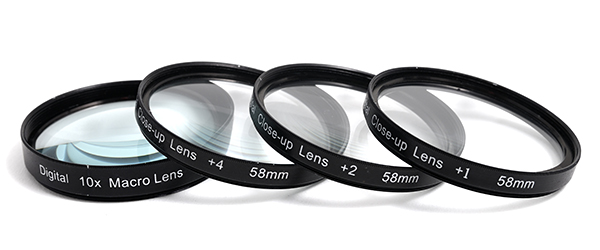
The lowest cost way to take close up pictures is to use a set of close up diopter filters on your lens, such as the four pictured in figure 3.
Figure 3 – A set of close up diopter filters for macro shooting on a budget
These filters cost only a few bucks online and do a reasonably good job with making extreme close ups. I bought a package of four filters with diopters (magnification factor) running from + 1 to +10 (figure 3).
These filters simply screw into the front of your prime lens (or zoom lens) and add magnification to the lens. It is sort of the same principle as using a magnifying glass. You screw the filter onto the front of the lens and it magnifies the close-up subject. There are different diopter “powers” in the filter set so that you can increase or decrease the magnification. The main limitation of diopter close-up filters is a very limited amount of focus control and somewhat lower quality images. They are not as convenient to use by any means, in comparison to a true macro lens. However, they do a pretty good job on taking extreme close up pictures and are much lower in cost.
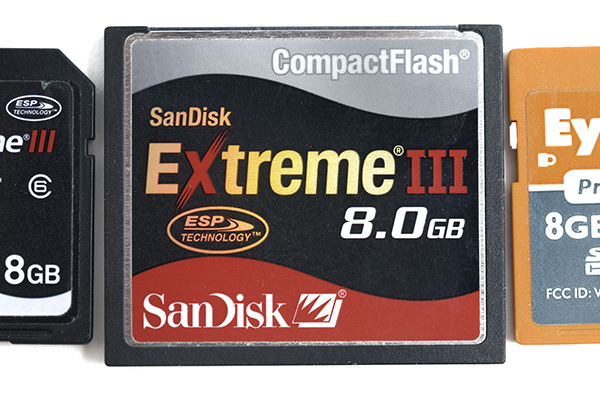
Figure 4 – Same subject as in figure 2 shot with diopter close up filters
With a diopter filter on your lens it cannot focus sharply on anything farther away than a few inches; therefore, the filter cannot be left on a lens for any other purpose than shooting the macro shots. While these filters can’t possibly give you the same quality edge to edge as a true macro lens (figure 2.30), they do provide the photographer on a budget with a way to make interesting close up pictures without spending a lot of money. Look on the back of your lens’s cap to see the correct size of filter to buy. The filters must match the screw-in filter size of the lens you will use them with.
Extension Tubes and Lens Bellows
You can get by without a true macro lens or screw-on filters—by using either extension tubes or a lens bellows. I use a lens bellows in the Great Smoky Mountains frequently. When it’s time to shoot some skittish, small wildlife, such as salamanders or butterflies, it’s best to stay far away from them. You could spend a large amount of money on a long macro lens, or you could buy an inexpensive bellows on eBay, like I did (figure 5).
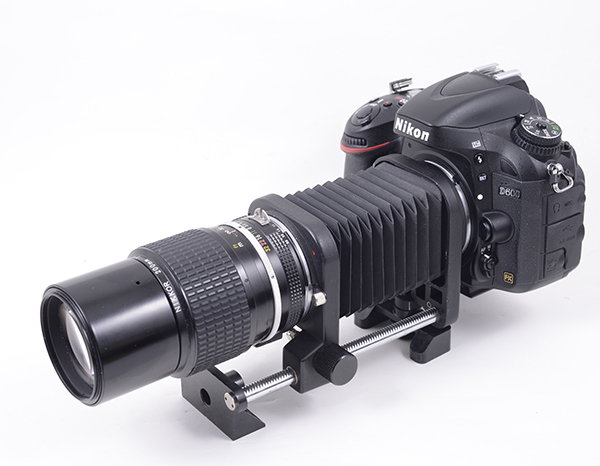 Figure 5 – Nikon D600 and an AI Nikkor 200mm f/4 lens on a low-cost bellows
These bellows are easy to use and allow you to stand at a good distance from small creatures to prevent scaring them. A good example is this image of a Pipevine Swallowtail female butterfly I shot while it was resting on the side of a mossy tree. I stood a good six feet (1.8 meters) away and cranked my bellows out to get the shot. The 200mm Nikkor lens is sharp as a tack and sells for a couple of hundred dollars used (or less). It works great as a macro lens on a bellows (figure 6). A bellows made for a Nikon F-mount lens can be purchased for around US$50 or less.
Figure 6 – Female Pipevine Swallowtail butterfly taken with a 200mm lens and a bellows
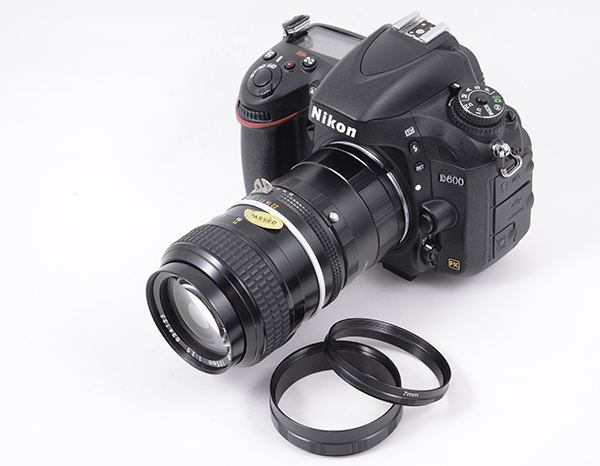
Another consideration is our final closeup rig for this article, a set of extension tubes. They are merely hollow metal tubes with a lens and camera mount on either end. Extension tubes can be acquired for, again, very little money, on eBay. In figure 7 you can see my Nikon D600 with an AI Nikkor 105mm f/2.5 lens on the longest (17mm) extension tube.
Figure 7 – Nikon D600 with a 17mm extension tube and an AI Nikkor 105mm f/2.5 lens.
Also, two extra extension tubes at 14 and 7mm.
In figure 7 you can see my entire collection of extension tubes, which includes 17mm, 14mm, and 7mm extension sections and an adapter for the Nikon F-mount. If I remember correctly, I paid US$15 for the entire set. There are, of course, much higher quality extension tubes sets than the cheapo set I bought for testing purposes. Nikon makes a much higher-quality set at a great price. Of all the macro systems I’ve used, I would have to say that extension tubes are the clunkiest and my least favorite, but they work okay if you match them with the best lens.
We have many choices when it comes to taking great macro shots. If you are serious about excellent macro photography and can afford to buy an extra lens, get yourself a true macro lens. It is a lot less hassle to use and gives you much better quality. If not, and your camera has non-CPU lens capability, buy a bellows, or an extension tube set and use your current camera and lenses.
If you’re a bit short of cash but still want to do macros, buy a set of the low-cost diopter filters that fit the screw-in filter ring on the front of your favorite lens. There’s more than one way to skin a ca … uh … take macro pictures!
Keep on capturing time…
Darrell Young
See my Nikon books here:
http://www.PictureAndPen.com/NikonBooks.asp

Very well done!