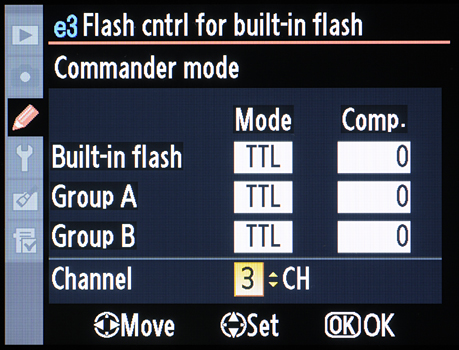
Figure 4 Published January 17, 2013 at 459 × 350 in Understanding Nikon’s Flash Commander Mode « Previous Next »