We all love the look of a beautiful waterfall or river with cascades. How do you go about capturing the wispy-looking water? What techniques and equipment are best used?
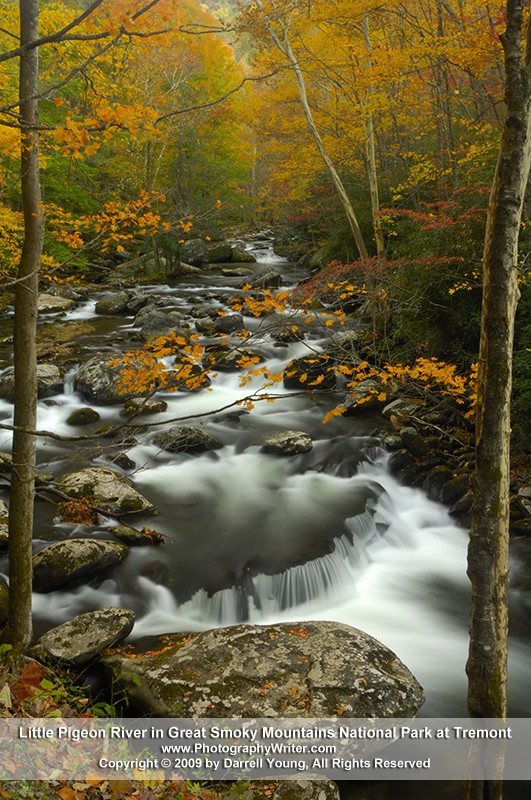
Any good Nikon DSLR will have all the controls you need to capture a shot like the one above from Tremont in Great Smoky Mountains National Park. The primary things you want for a shot like this one are a slow shutter speed, low ISO setting, and a small aperture for excellent depth of field.This will require a camera with fully adjustable controls.
Follow these specific steps for best results:
- Shoot on an overcast day only, which will keep the contrast under control.
- Use a circular-polarizer filter on your lens to dial out reflections from the water.
- Use a solid tripod at all times.
- Use aperture-priority mode (A).
- Stop down to f/11 or f/22 for maximum depth of field.
- Set the camera’s ISO to a low value like 50, 100, or 200.
- Focus 1/3 of the way into the scene.
- Fire the shutter by remote with reflex mirror up if available.
The exposure may be several seconds long due to low light. Make sure you fire the shutter without touching the camera, for much sharper pictures. If you are shooting with a Nikon DSLR, you could use a remote release, the self timer, or the MUP mode, which will fire by itself after 30 seconds.
On an overcast day the light should be low enough to allow a longer exposure. Anything longer than about 1/10 second should make a satisfying flow appearance. If it is bright where you are shooting, you may have to use a neutral-density filter to cut down on the light so that exposures are long enough to make the water look like a lovely flow.

Large Cascade in the middle prong of the Little Pigeon River in Tremont of Great Smoky Mountains National Park, Tennessee, USA in mid May.
Vary the shutter speed for different looks in the water flow. A very slow shutter speed (2 to 10 seconds) will make a very foggy or wispy look, while a faster shutter speed (1/15 to 2 seconds) will look more like what your eye normally sees. Experiment!
Keep on capturing time…
Darrell Young

Darrell Young is an active member of the Nikonians User Community, Nikon Professional Services (NPS), Professional Photographers of America (PPA), North American Nature Photography Association (NANPA), and the author of 18 photography books from NikoniansPress and Picture and Pen Press, through Rocky Nook. You may review a few of Darrell’s books here. He has been an avid photographer since 1968 when his mother gave him a Brownie Hawkeye camera. Here is one of Darrell’s nature image portfolios.
His website, www.PictureAndPen.com, was created to support the readers of his educational books, photography students, and clients. Visitors to his website will find articles and reviews designed to inform, teach, and help you enjoy your photographic journey.
Join Darrell on Facebook, Twitter, and Google+
NICE WORK
Very nice shots you have there. Thank you for sharing pics and advice
Darrell!!! Thank you so much! You’re a great encouragement to me! Thank you for being so talented!
Great article Darrell! There is one additional step that I have found to be very helpful and that is to block any light from coming into the camera from the view finder. With the mirror up, any light that enters from the view finder can spill onto the sensor. What I have found useful is a flap of gaffer’s tape over the view finder. I am also a big fan of variable neutral density filters, they allow you to shoot even on fairly sunny days. Thanks again for the information.
Greg Weseman
Pingback: Photographing the Appalachian Mountains with a Nikon | Master Your Nikon®